

Promotions & Campaigns
Create promotional banners, pop-ups, videos, and campaigns, then target, schedule, and activate them across your storefront and learner experience.
Promotions & Campaigns
Promotions are the on-site marketing surfaces of your workspace — banners, pop-ups, announcement bars, videos, and multi-element campaigns that Admins use to drive engagement and conversions. You build each one in a step-by-step Promotion Wizard with a live preview, choose where and to whom it appears, schedule when it runs, and optionally link a discount coupon. This page covers the Promotions list and the full wizard flow.
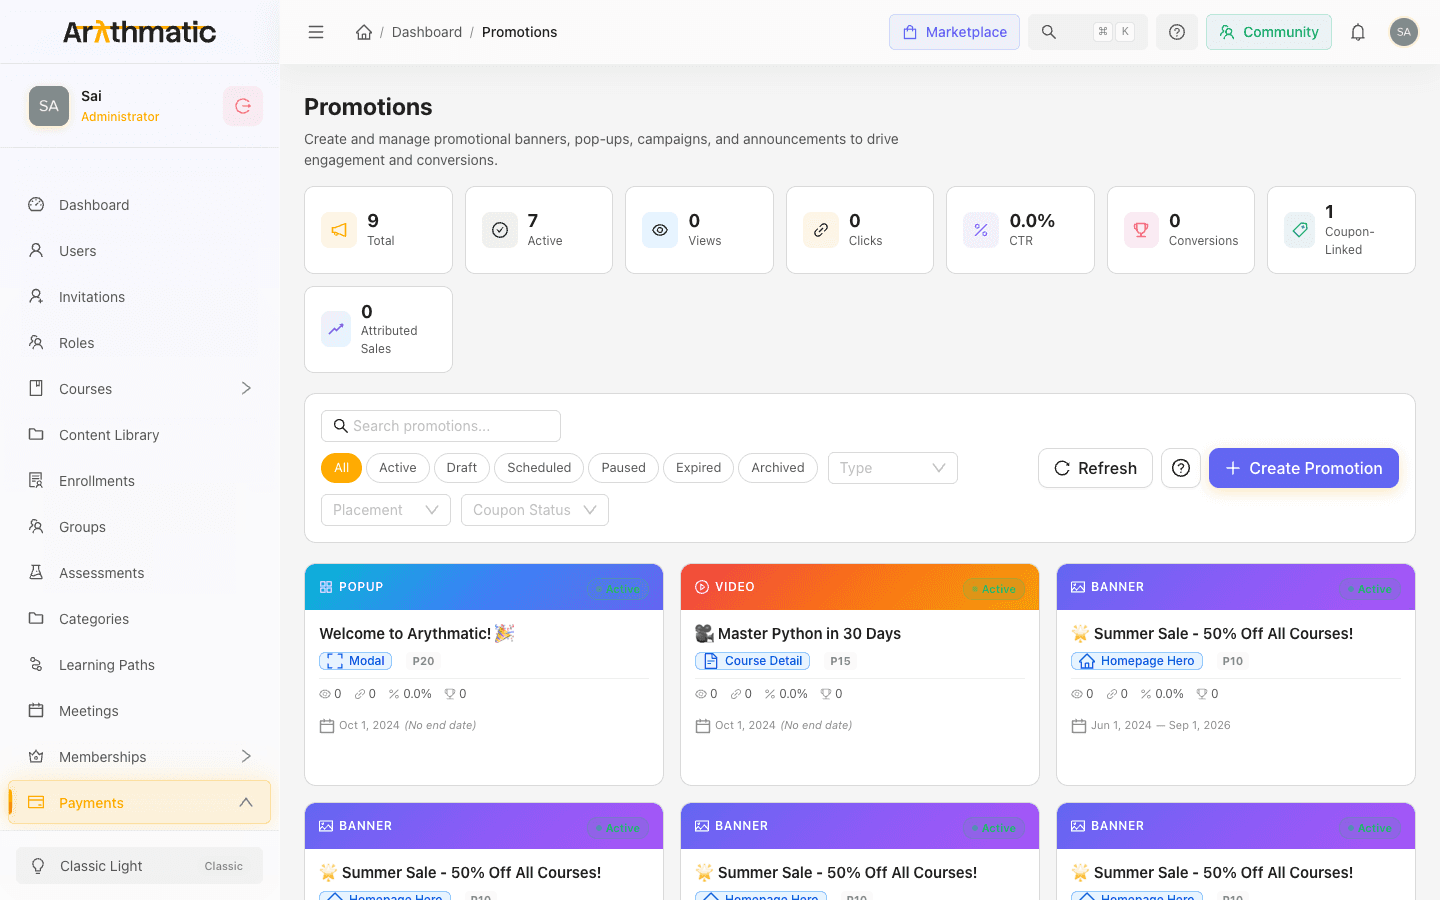
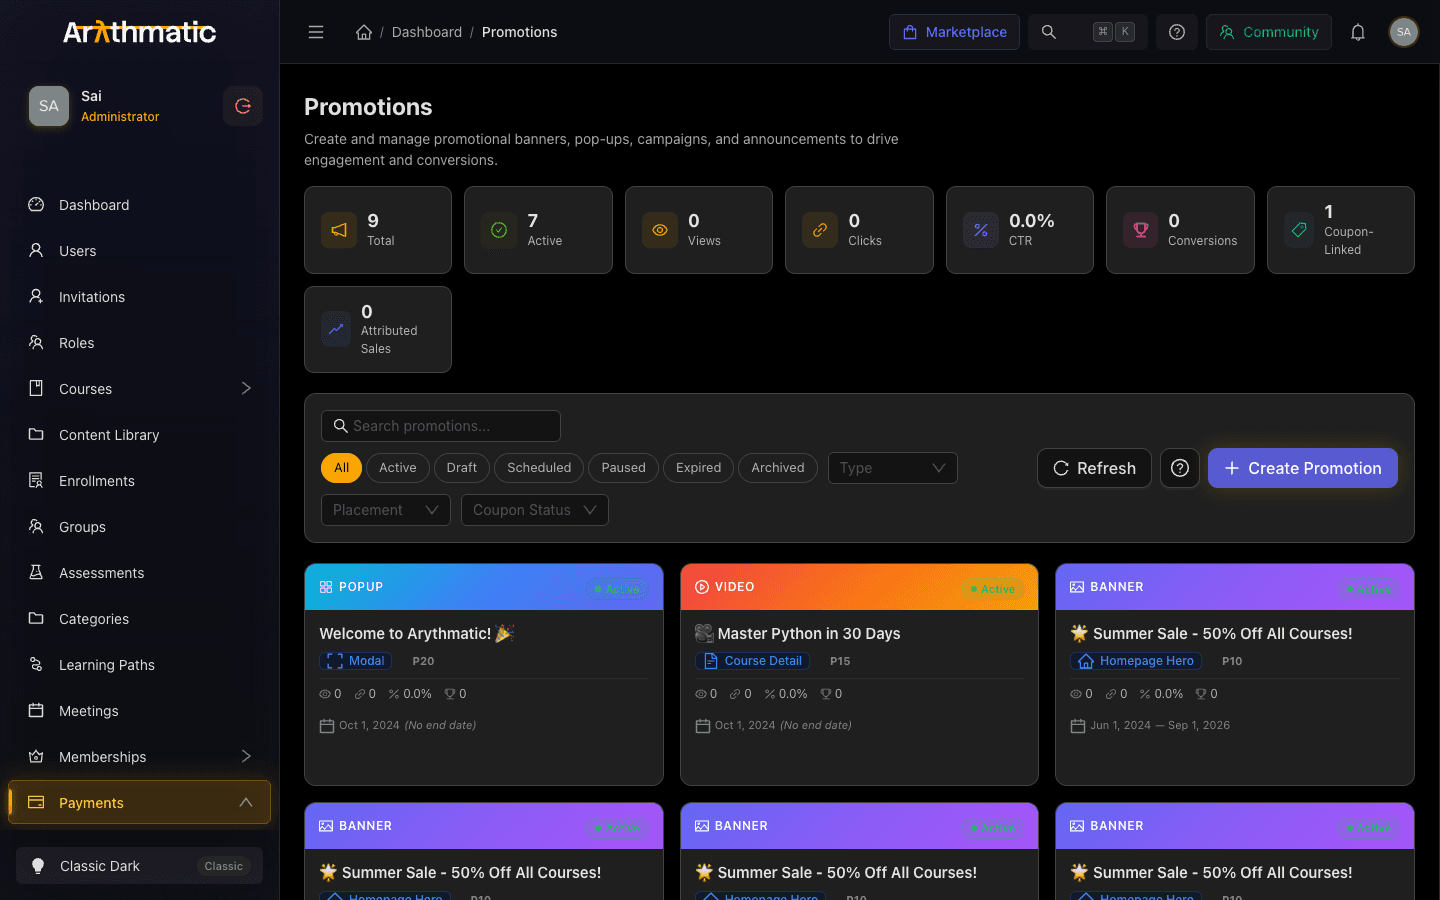
The Promotions list
Open Promotions from the sidebar to see every promotion in your workspace as a grid of cards, with a statistics bar across the top. Each card shows the promotion's title, type, placement, and status, and exposes quick actions to activate, deactivate, edit, or delete it.
The filter bar lets you narrow the list:
| Filter | What it does |
|---|---|
| Search | Match promotions by title. |
| Status pills | Filter to Active, Draft, Scheduled, Paused, Expired, or Archived (or All). |
| Type | Filter by promotion format (Banner, Video, Pop-up, Campaign, Announcement, Featured, Countdown, Slider). |
| Placement | Filter by where a promotion is shown (for example Homepage Hero, Checkout, Course Detail). |
| Coupon Status | Show only promotions With Coupon or Without Coupon. |
Use Clear filters to reset, Refresh to reload, and Create Promotion to launch the wizard. Deleting a promotion is permanent and asks for confirmation first.
Promotion types
The type you choose determines the format of the promotion and which content fields the wizard offers.
| Type | Description |
|---|---|
| Banner | Full-width promotional banner. |
| Video | Video with thumbnail and CTA. |
| Pop-up | Modal pop-up overlay. |
| Campaign | Multi-element campaign. |
| Announcement | Slim notification bar. |
| Featured | Featured content spotlight. |
| Countdown | Urgent, time-limited offer. |
| Slider | Carousel-style promotion. |
Banner, Pop-up, Campaign, Featured, and Slider types support rich HTML content and an image upload. Video is the only type with a video upload and a dedicated thumbnail.
Creating a promotion in the wizard
Click Create Promotion to open the wizard. A sidebar on the left tracks six steps with a completion progress bar; the panel on the right shows a live preview that updates as you type. You can move with Next / Previous or jump directly to any step you have already reached. Each step validates before it lets you continue.
Step 1 — Basic Info
- Enter a Title (required) — this is the internal name used for the promotion.
- Optionally add a Display Title, the styled headline shown to end users (it supports emojis like 🎉 and 🔥).
- Add an optional Description (up to 300 characters).
- Set Priority with the slider (Low → Med → High). When several promotions compete for the same placement, priority helps decide which shows.
- Choose an initial Status: Draft, Active, or Scheduled.
Step 2 — Type & Placement
- Pick a Promotion Type from the type cards (see the table above).
- Choose a Placement — where on the site the promotion renders. Options are grouped by area, including homepage slots (Homepage Hero, Top, Mid, Featured, Bottom), site chrome (Header, Notification Bar, Footer, Sticky Bottom, Floating Corner, sidebars), catalog and course pages, learning path pages, the learner Dashboard, commerce surfaces (Checkout, Post-Checkout, Cart, Membership Page), overlays (Modal, Exit Intent), and auth and content pages (Login, Signup, Profile, Search Results, Blog, Inline Content).
- Set the Target Audience — All Users, New Users, Enrolled Users, Non-Enrolled, Inactive Users, Premium Users, or Free Users.
Match the placement to the audience. For example, a Checkout or Cart placement targeting Non-Enrolled users is a natural home for a first-purchase coupon, while a Dashboard promotion targeting Enrolled Users works well for cross-sell.
Step 3 — Content & Media
The fields here change based on the type you selected in Step 2:
- Rich Content (HTML) — for Banner, Pop-up, Campaign, Featured, and Slider. Accepts HTML that is rendered inside the promotion.
- Promotion Image — for the same content types. Upload a JPG, PNG, GIF, WebP, or SVG up to 10 MB, or paste an image URL. The wizard shows a recommended size for the chosen type (for example 1200×630 px for banners, 800×600 px for pop-ups).
- Promotion Video and Video Thumbnail — for the Video type only. Upload an MP4, MOV, or WebM up to 500 MB (recommended max 120 seconds), plus a 16:9 thumbnail shown before playback. A URL fallback is available for both.
- Call to Action — for all types. Set the CTA Button Text and CTA Link URL.
Uploaded files are held locally and listed under Pending Uploads with a "Will upload on save" tag. They are sent to the server only after the promotion is created or updated, so if an upload fails you can re-upload it later from the edit page.
Video promotions require a video. If you select the Video type but leave both the upload and the video URL empty, the wizard blocks you from continuing past this step.
Step 4 — Coupon Linking
Optionally link an existing discount coupon to the promotion and choose whether it should auto-apply. This step is optional — leave it empty for a purely informational promotion. See Coupons & Discounts to create the coupon first.
Step 5 — Schedule & Rules
- Set a Start Date (required, with time). This is when a Scheduled promotion goes live.
- Optionally set an End Date — leave it empty for an open-ended promotion.
- Configure display rules:
- Dismissible — users can close the promotion.
- Show Once — display it only once per user.
- Active — make it live immediately.
- Optionally set Max Impressions to cap the total number of views; leave it empty for unlimited.
Max Impressions is a kill-switch, not just a cap. When a promotion's view count reaches the Max Impressions value, Arythmatic forces its status to Expired and turns its Active switch off — the promotion is deactivated, not merely hidden. To run it again you must raise (or clear) the cap and re-activate it. The End Date behaves the same way: once it passes, the promotion is auto-expired on its next save. Status is re-derived from the start/end dates and impression count automatically, so a promotion moves through Scheduled → Active → Expired on its own.
Step 6 — Styling
Fine-tune the appearance with a Background Color and Text Color (color picker or hex value), and optional Custom CSS to override default styles. Quick Presets (Dark Elegant, Ocean Blue, Warm Sunset, Forest Green, Royal Purple, Clean White) fill both colors in one click. Every change is reflected in the live preview.
Activating a campaign
When you finish the steps, click Create Promotion (or Update Promotion when editing). The wizard validates all steps before submitting; if anything is missing it jumps you back to the offending step.
Whether a promotion goes live depends on its status and schedule:
- Set the Status to Active (or check Active in Step 5) to publish it right away.
- Set the Status to Scheduled and it goes live automatically at the Start Date.
- Leave it as Draft to keep working on it privately.
From the Promotions list you can flip a promotion between active and paused at any time using the card's activate / deactivate action, without reopening the wizard.
Measuring promotion performance
Every promotion is a measurable marketing surface, not just a piece of content. Arythmatic tracks per-promotion engagement counters and derives rates from them:
| Metric | What it counts |
|---|---|
| Views | Times the promotion was shown (also drives Max Impressions). |
| Clicks | Times a user clicked the CTA. |
| Dismissals | Times a user closed a dismissible promotion. |
| Conversions | Purchases attributed to the promotion. |
| Click-through rate | Clicks ÷ views. |
| Conversion rate | Conversions ÷ views. |
When a learner buys after interacting with a promotion, that purchase is attributed back to the campaign (recorded on the transaction as its source promotion), so you can tie revenue to a specific promotion. If you linked a coupon with auto-apply in Step 4, clicking the CTA applies that code automatically, closing the loop from impression to discounted purchase.
Related
- Coupons & Discounts — create the discount codes you link to a promotion
- Course Pricing — set the prices a promotion drives traffic to
- Learning Path Pricing — bundle pricing for the paths you promote
Coupons & Discount Codes
Create and manage percentage or fixed-amount discount codes with validity windows, usage limits, and course or learning path targeting.
Membership Plans
Create and manage membership plans that grant learners free or discounted access to courses and learning paths over a fixed validity period.
