

Preview and Publish
Review your course from the manage dashboard, then publish it to make it available for enrollment.
Preview and Publish
Before you make a course visible to learners, preview it to catch any issues. When you are satisfied, publish the course to open it for enrollment.
Reviewing a course before you publish
The Curriculum Builder header has a Preview button. It takes you back to the internal course detail page in the manage dashboard so you can review the course from the admin side before you publish. It does not open a separate learner-facing course player.
How to open it
- Open the course and go to the Curriculum tab.
- Click Preview in the builder header.
You land on the course detail page, where you can check the course as it is configured.
What to check on the course detail page
- The course title, description, thumbnail, and author information as they will appear in the catalog
- The full section and lesson structure in the curriculum
- That every content item has been filled in or uploaded — walk through each lesson's editor to confirm the media, article text, quiz questions, or external URL is in place
- Pricing, category, and settings are configured the way you intend
The separate Preview control on the course detail page (the play button on the course header) plays the course's marketing preview video clip — the short promotional trailer shown in the catalog. It is not a full run-through of the curriculum.
Marketing preview settings
The catalog trailer has a few settings beyond just uploading a video:
| Setting | What it controls | Values |
|---|---|---|
| Preview enabled | Turns the marketing preview on at all (off by default) | On / Off |
| Preview type | What the preview shows | Video, Thumbnail only, External URL, or Mixed |
| Preview access level | Who is allowed to watch the trailer | Public, Registered Users Only, or Enrolled Users Only |
For an externally hosted trailer, the external URL type also records where it lives (YouTube, Vimeo, Loom, or a plain external URL).
Preview access level gates who can watch the trailer. The default is Public. If you set it to Registered Users Only or Enrolled Users Only, prospective learners browsing your public catalog won't be able to play the trailer — so leave it Public for a marketing funnel meant to convert new visitors.
Publishing a course
Publishing makes the course live — it becomes enrollable by learners (subject to your visibility and pricing settings).
Pre-publish checklist
Before you publish, confirm:
- The course has at least one section with at least one content item
- All video lessons have finished processing (no "Processing" indicators)
- Quiz lessons have at least one question
- The course title, description, and thumbnail are filled in
- Pricing and enrollment type are configured correctly
- You have reviewed the course on the course detail page and it looks right
How to publish
- Open the course.
- Click Publish Course.
- What happens next depends on the course's state:
- If the course is already assigned to at least one group, it publishes directly. If certificates are enabled for the course, a certificate confirmation appears first (see below) — click Publish to confirm.
- If the course has no groups assigned, a No Groups Assigned warning appears instead (see below). Without a group, learners cannot see or access the course.
Because learners access courses through groups, a course only becomes visible once it belongs to at least one group. Assigning groups is not a separate step in every publish — you are only prompted for it when the course has no groups yet.
Certificate confirmation
If certificates are enabled for the course, publishing shows a "Publish course?" confirmation reminding you that a learner who completes the published curriculum (100% progress) earns a certificate — so your curriculum should be complete before publishing. Click Publish to continue or Cancel to go back.
The "No Groups Assigned" warning
If the course is not assigned to any group, publishing opens a No Groups Assigned dialog with three ways forward:
- Publish to Everyone Group — a one-click quick action that adds the course to the built-in "Everyone" group and publishes it, making it visible to all learners in a single step.
- Publish Anyway — publishes the course without any group. Learners won't see it until you assign it to at least one group later.
- Assign Groups First — closes the warning and opens the Assign to Groups dialog so you can pick groups before publishing.
Assigning groups
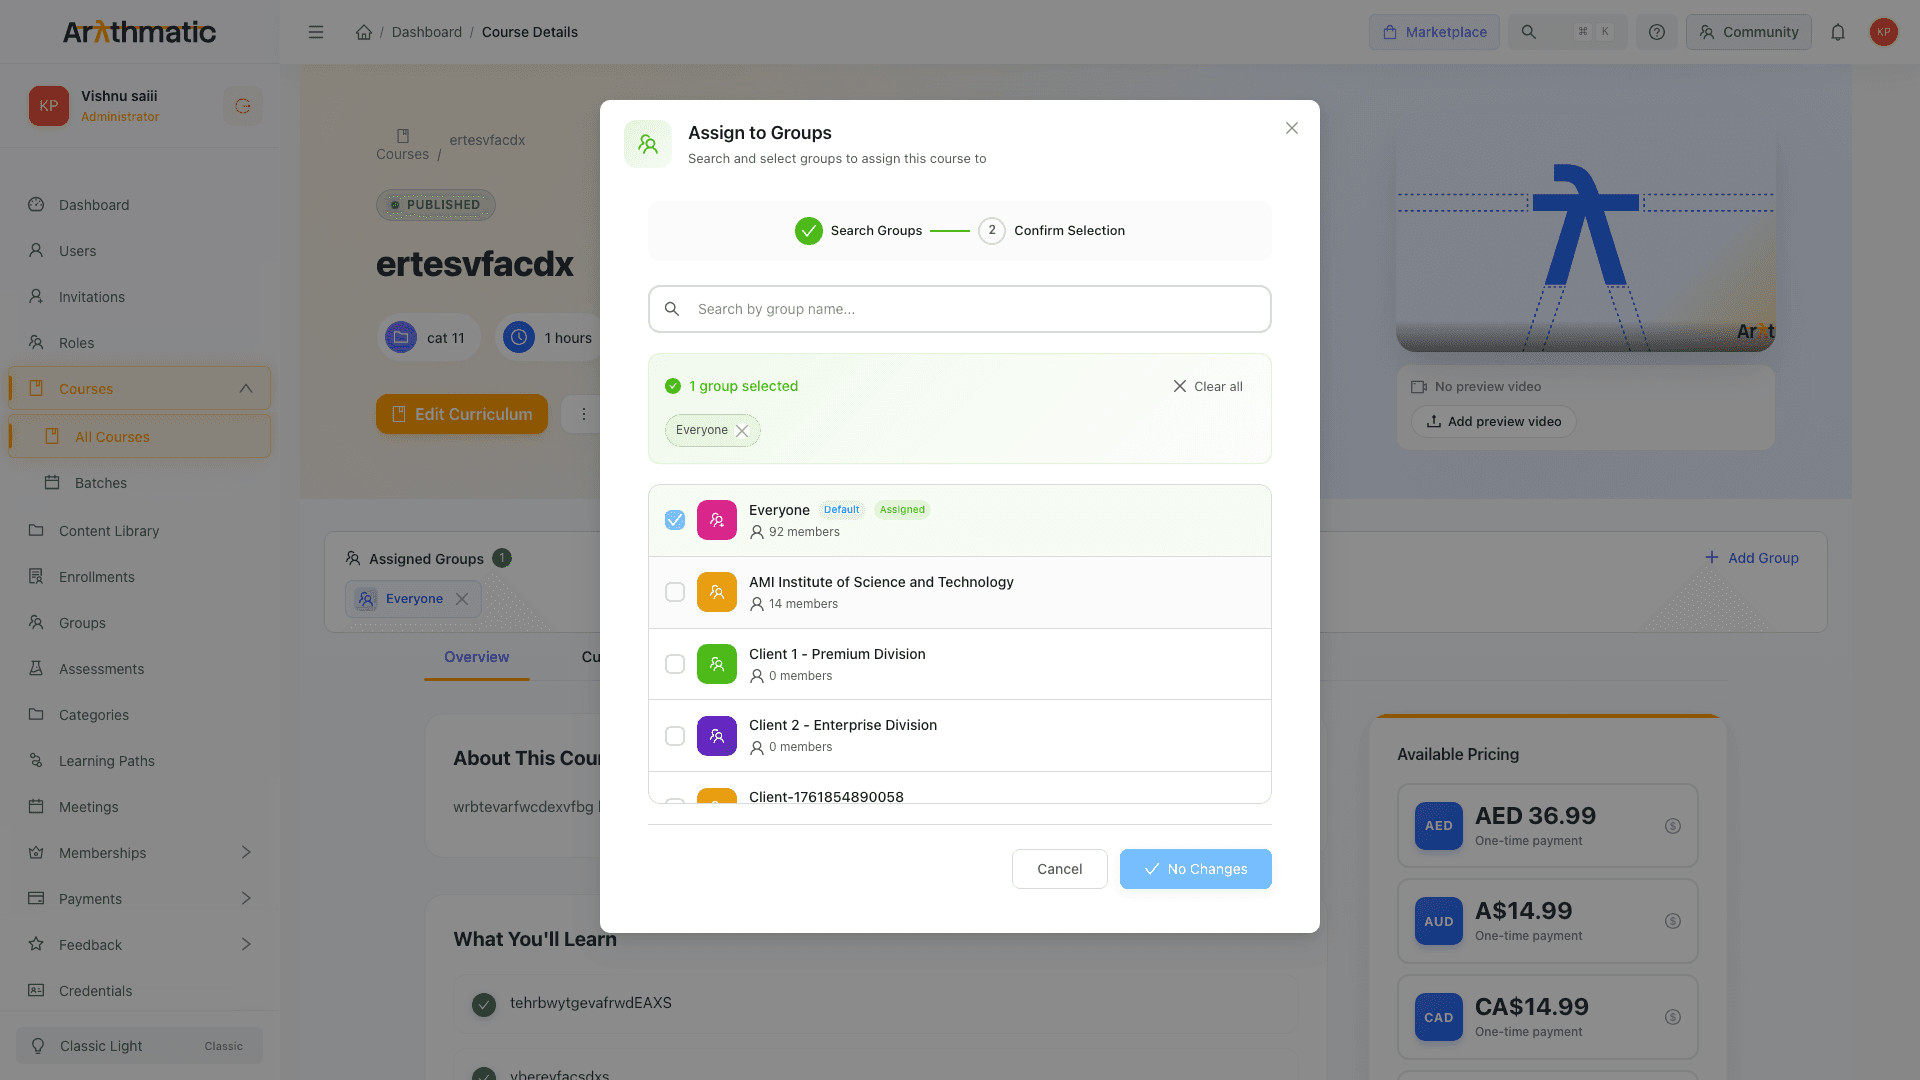
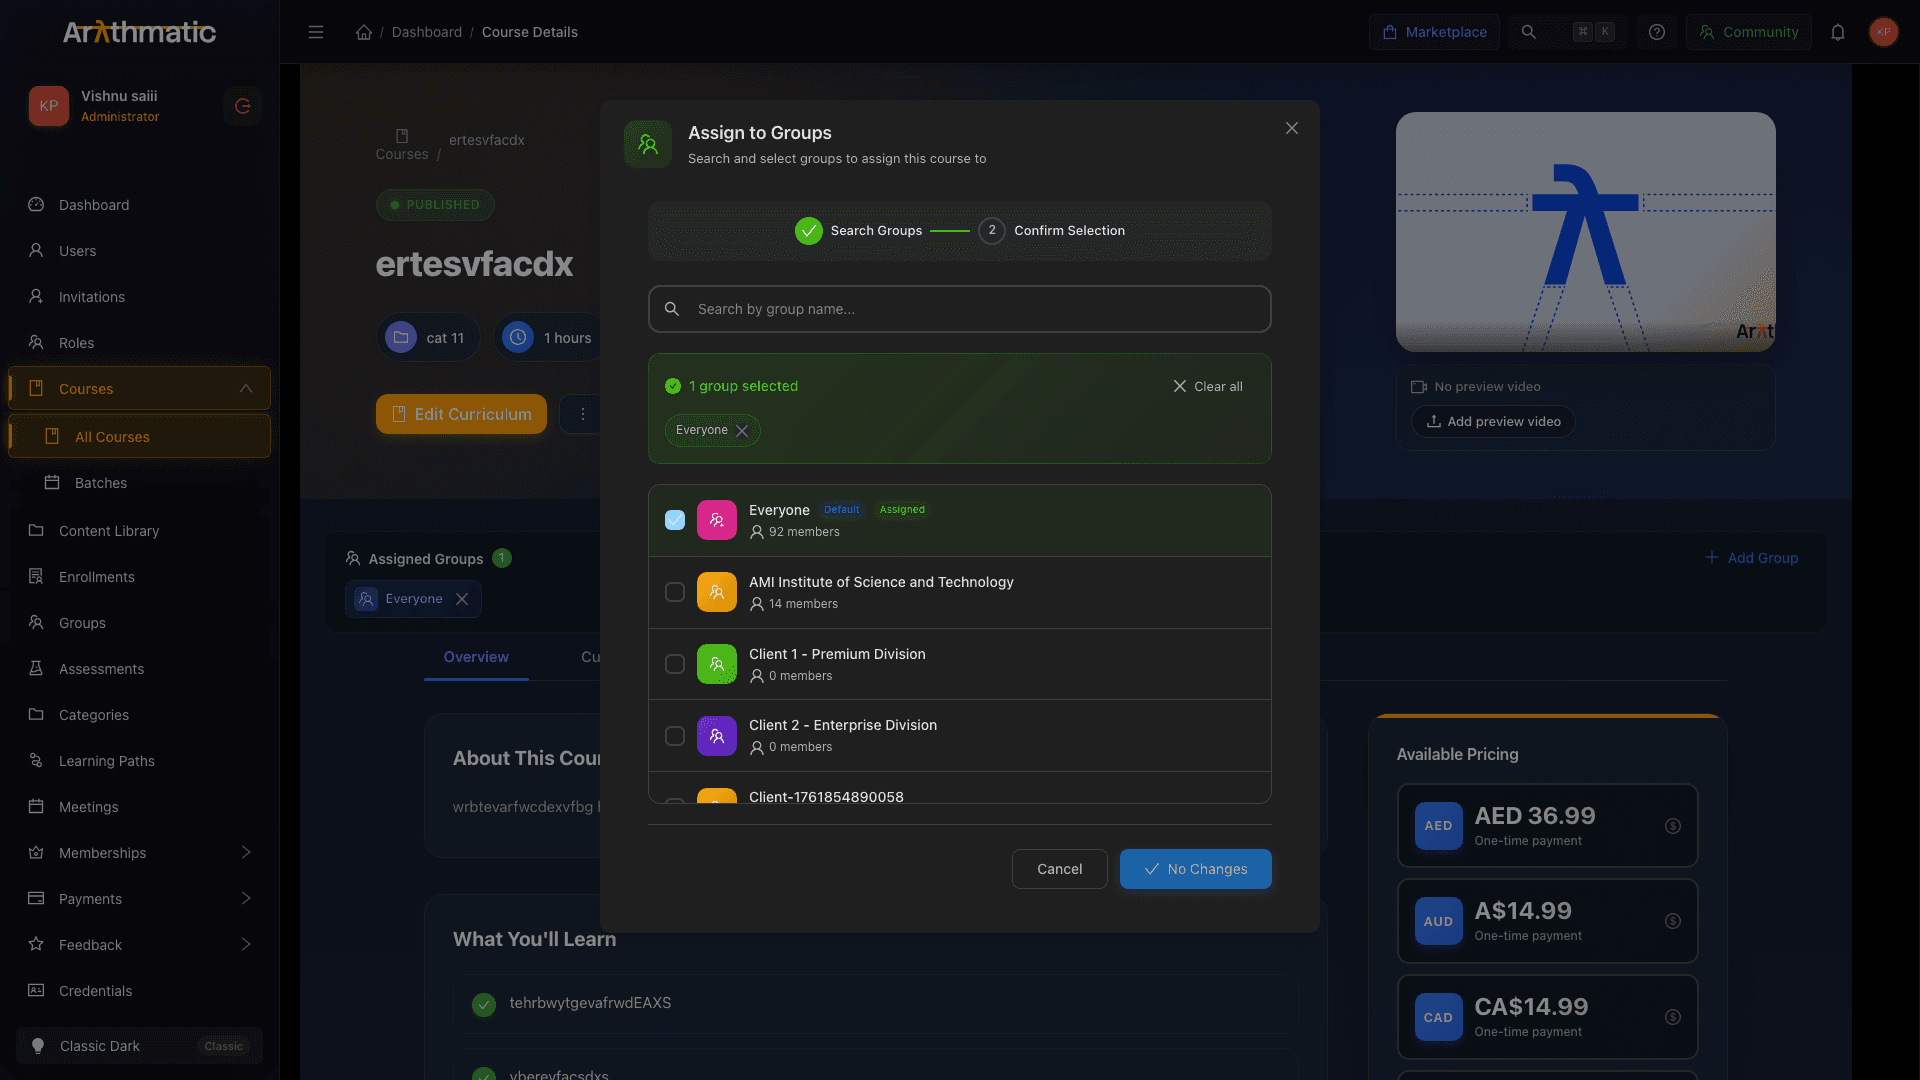
The Assign to Groups dialog is a search-by-name picker: type a group name, then select one or more groups from the results. Already-assigned groups are pre-selected, and the built-in Everyone group appears in the list as a normal row marked with a Default badge — it is not a separate top-level option.
| Group | Who gets access |
|---|---|
| Everyone (Default badge) | All learners on your platform — the broadest option. This is a regular group row, not a separate radio choice. |
| Custom group | Only members of the selected group(s). Use this for internal training, cohort-specific content, or client-specific courses. |
You can select multiple groups. The primary button reads Save Changes when you have added or removed groups, and No Changes when nothing has changed. Click Save Changes to apply the assignment.
Once published, the course status changes from Draft to Published. If your catalog is enabled for public access, the course immediately appears in the learner catalog. Enrolled or invited learners in an assigned group can now access their lessons.
What publish does
- Changes the course status to Published
- Makes the course accessible to enrolled learners via the learner portal
- Makes the course appear in the catalog (if public access is enabled on your workspace and the course is set to open enrollment)
- Does NOT automatically enroll anyone — learners still need to enroll or be enrolled by an admin
Unpublishing a course
You can return a published course to Draft at any time.
- Open the course.
- Click Unpublish (or toggle the status back to Draft).
Effect on learners: Learners who are already enrolled retain their progress, but they will lose access to the course content while it is in Draft. When you re-publish, they regain access automatically.
Unpublishing is useful when you need to revise content, update pricing, or temporarily remove the course from the catalog.
Archiving vs. deleting
| Action | What it does |
|---|---|
| Unpublish | Returns to Draft; enrolled learners lose access temporarily |
| Archive | Removes from the catalog but preserves enrollment records and progress |
| Delete | Permanent removal; not available if the course has active enrollments |
If you need to retire a course permanently while preserving learner records, archive it rather than delete it.
Course Pricing
Set a course as free or paid, configure multi-currency prices with optional compare-at amounts, cap enrollments, and control how prices are localized for learners.
Learning Paths — Overview
Understand what Learning Paths are, how they work, and when to use them instead of standalone courses.
